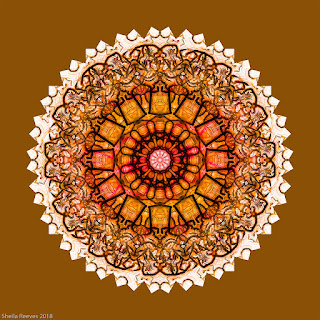
There is more to photography than simply taking pictures. Post processing can become an exciting and creative tool to transform your images into works of art. Sheila Reeves shares with us her process to create Kaleidoscope Patterns from images. Give it a try...I believe you will discover a new world filled with artistic flavors.
Part 1:
Open your image in Photoshop
Right click on the image in the
layers panel, and select Convert to Smart Object.
Add space around the image:
Go
to Image > Canvas Size.
Set
the length and width to be at least 1” larger than two times the current value
for the long side.
Then zoom out so you see the entire canvas on your screen.
Use the Move Tool to drag your photo toward
the upper left edge of the canvas, leaving a little blank space at the top and
on the right.
Duplicate your image by right
clicking it in the layers panel and selecting Duplicate Layer (or use shortcut
Ctrl+J or Cmd+J).
Rename
this layer as Layer 1.
Keeping Layer 1 selected, click Edit
> Transform > Flip Horizontal.
Use the Move Tool to drag Layer 2
down and left so it lines up with, and touches the original layer.
Keeping Layer 2 selected, click Edit
> Transform > Flip Vertical.
Select Layer 0 and duplicate it
again. Rename this new layer as Layer 3.
Use the Move Tool to drag Layer 3
down and to the right so it completes a rectangle.
Keeping Layer 3 selected, click Edit
> Transform > Flip Horizontal. Then click Edit > Transform > Flip
Vertical.
The next step is to merge the layers
of the rectangle you have made so it can be moved around as one layer:
Right-click on Layer 0 in the layers panel and select Merge Visible. With the
Move Tool selected, drag the layer into the center of the canvas. Decide on a
rotation angle – any number that can be divided evenly in 360. The smaller the
angle, the more complex the kaleidoscope. I like to use 15.
Part 2:
Part 2:
Duplicate the layer. Rename the layer
with a number 1 greater than highest layer number. (Layer 1, Layer 2, etc.)
Make sure you have selected the layer
you just created. Click Edit > Transform > Rotate.
The Transform settings panel is at the top of the screen. In the box next to the symbol of an angle, enter your rotation angle value, and press enter. Then select the check mark box to apply this rotation.
Repeat steps 16-18 until you have completed your kaleidoscope. The number of layers you create will depend on the angle of rotation you choose.
45 degrees à layers 0-3
30 degrees à layers 0-5
15 degrees à layers 0-11
10 degrees à layers 0-17
Part 3:
Now you need to blend the layers together:
Select all layers except layer 0 in the layers panel by holding down the shift key and clicking on layer 1 and the highest number layer. With the layers selected, click on the Blending Mode drop down menu (it should say normal) and select the Lighten Option. You may want to try different blend modes and see which one you like best.
Finally, crop the image to clean up jagged edges and do any other editing you wish to do.

Save your Kaleidoscope via File > Save As.


No comments:
Post a Comment